
The general principle for installing sails is to connect the highest corner(s) first followed by the remaining points.
Do not fully tighten each corner until all are attached to their relevant fixing points.
Once all points are loosely connected slowly work your way around the sail (starting at highest points first) tensioning each fixing point little by little until loads are distributed evenly at each corner.
Allow 2 people approx 7-10 mins to erect the sail. (one person approx 15)
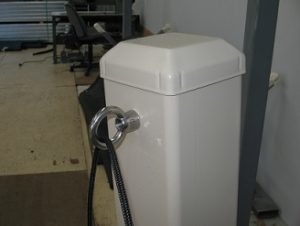
Step 1:
Place rope through eyebolt
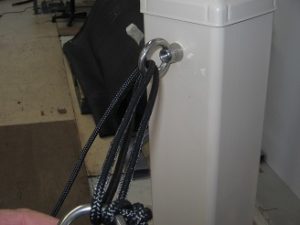
Step 2:
Then go back through ring on shade sail as shown i.e.: come up through bottom of the ring
Step 3:
Then back through the eyebolt
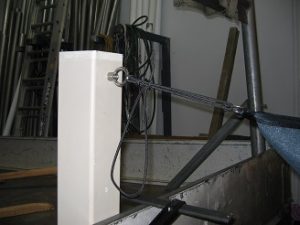
Step 4:
At this stage tie the fixing point off loosely and move on to the next corner.
Step 5:
Once all corners are attached loosely then start to work around the sail tensioning each point as tight as you can by hand
Note: that load is always placed on the fixing point and not the sail when tensioning. Tie each corner off as you go around..
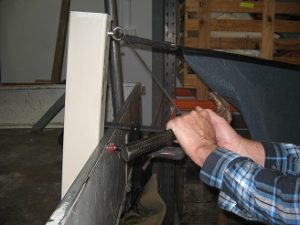
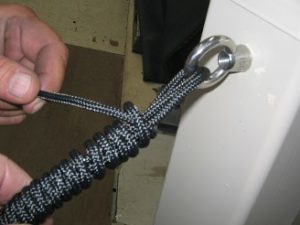
Step 6:
Once all points are reasonably tight using a steel bar or similar (bare hands are OK if they are tough enough to handle rope burn) tighten the sails fully.
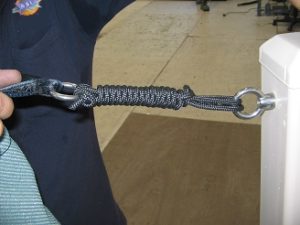
Step 7:
Then wrap the excess rope as shown around the sail a minimum of 3 rotations, preferably more
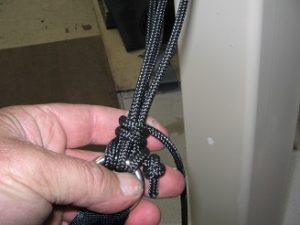
Step 8:
Tie sail off using a minimum of 2 ½ hitches (granny Knots). Note that load is always placed on the fixing point and not the sail when tensioning. Tie each corner off as you go around.
Step 9:
Tuck excess rope away and finished tie off should look similar to this.
Online store to purchase your custom-made high-quality sails that shade online.
In addition to our Custom Shade Sails service, we offer a large range of fixed-size Shade Sails for sale.
DIY Shade Sails. Buy Shade Sails Online.